A Cooking Machine - Initial App Interface Design Visualization & Software tool
This is the fifth in a series detailing the processes behind the research, design, material selection, assembly and programming of a cooking machine. See the column Stories of Food & Tech here.
In this post, I will show you the design interface of the “Cooking Robot” iPhone app I designed and explain the basic workflow of the interface. Although the interface designs I shared in the hand-drawing images below don’t represent the app’s final look, they describe the fundamental functions that I hope to implement in this cooking machine.

Main Page Interface
Four different functions are shown on the “Main Page” of this iPhone app for users to select: 1) Register the cooking machine, 2) Dish preset, 3) Cooking monitoring, and 4) Cooking history & analytics.

Register the Cooking Machine Interface
The “Register the Cooking Machine Page” should always be set up first before cooking. Here, the recipes will first be uploaded to a cloud database through the app, and then they will be downloaded onto the cooking machine based on its ID.
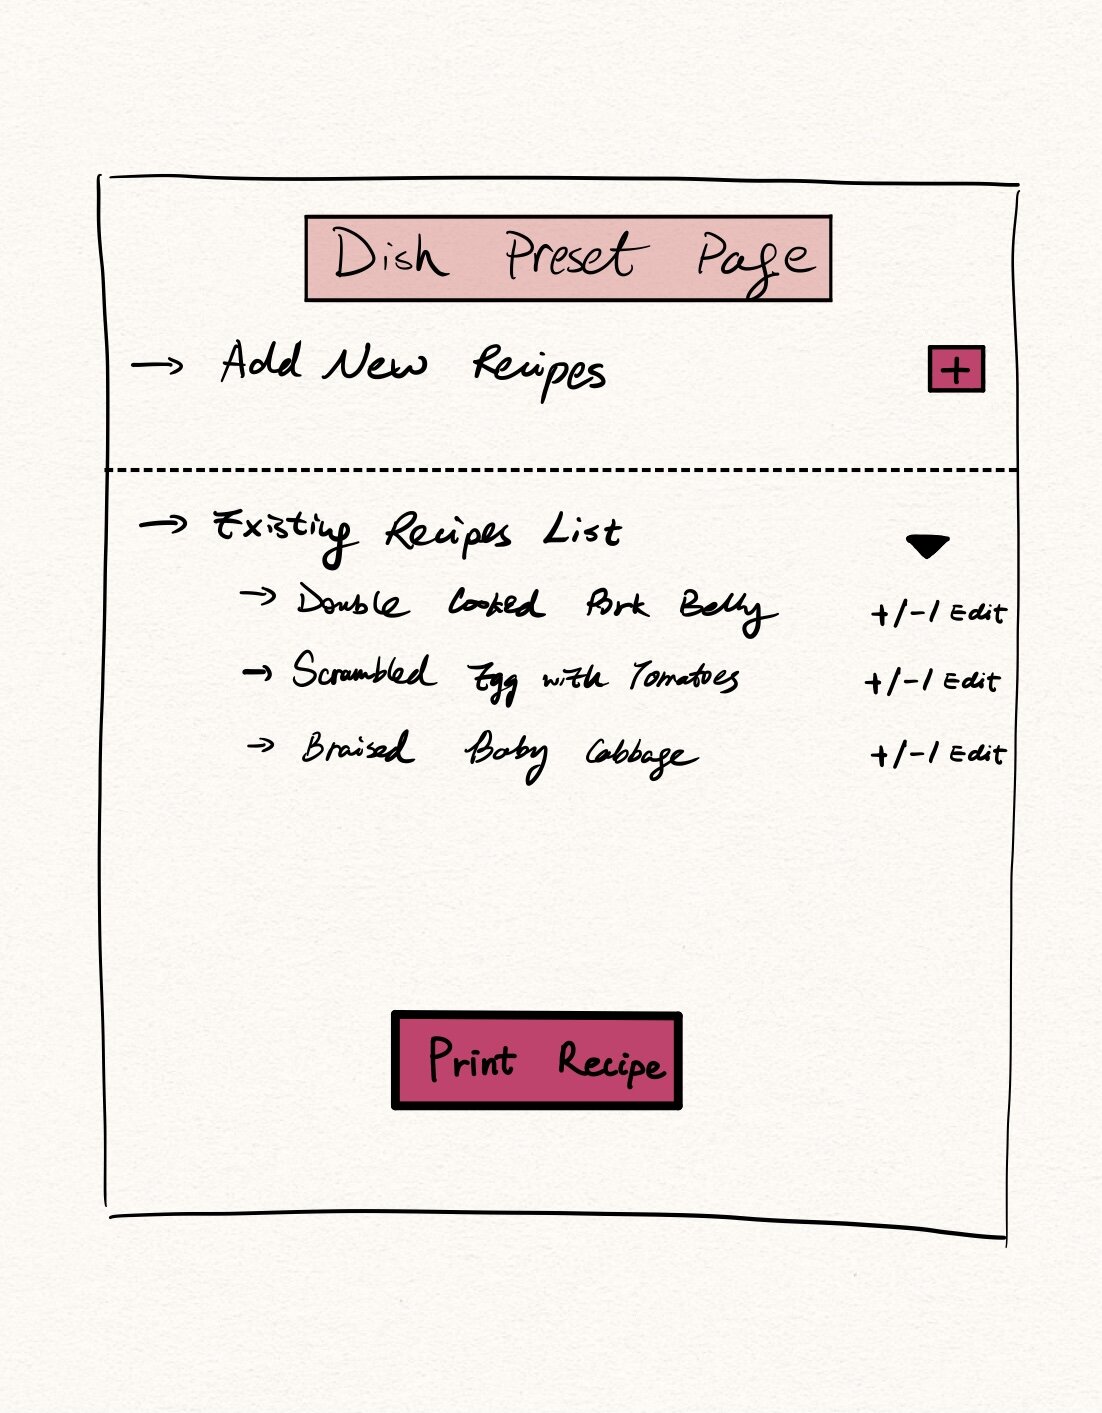
Dish Preset Interface (2 pages)
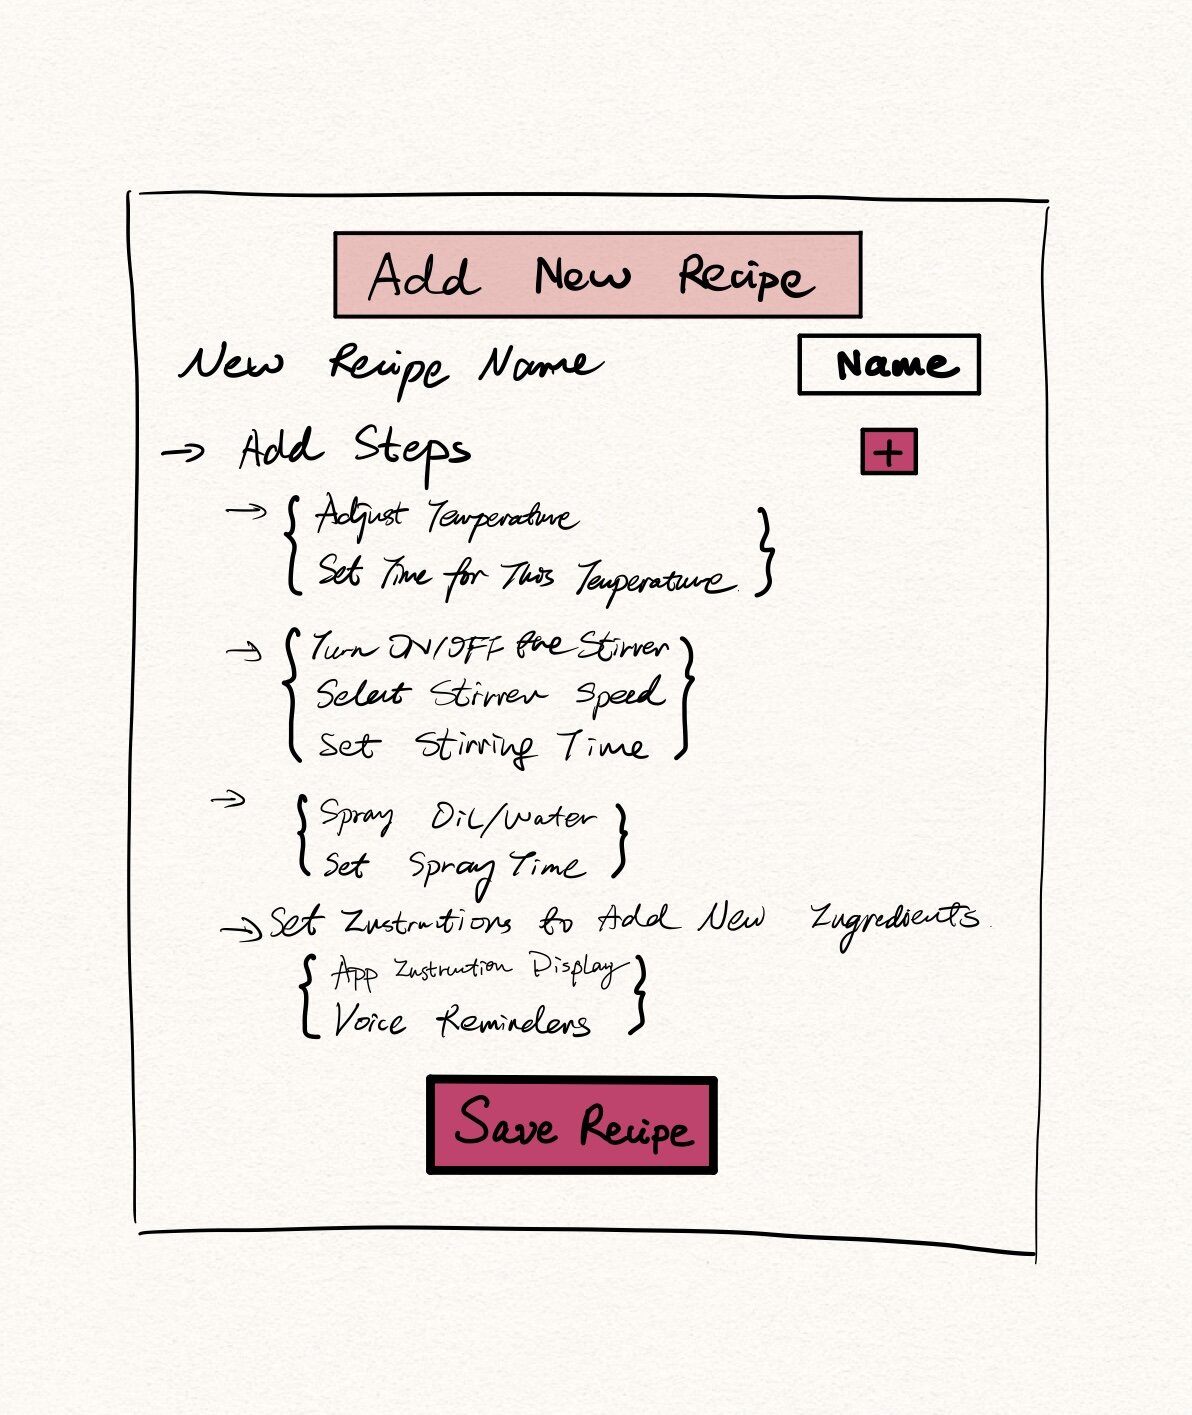
The “Dish Preset Page” allows users to add new recipes or edit existing recipes. Users can also select an existing recipe and print it out so that they can share it with friends and families. When the user selects “Add New Recipes”, the app will take them to a setup page to enter the recipe name and to input each cooking step, including:
1) Adjust pot temperature and set cooking time.
2) Turn on/off stirrer, select stirrer speed and set stirring time.
3) Spay oil/water and set spray time.
4) Set instructions to add new ingredients through the app’s instruction displays or voice reminders (voice assistant).
Once the user selects “Save Recipe”, the recipe is uploaded to a MongoDB’s database, an application data platform, stored in the cloud.
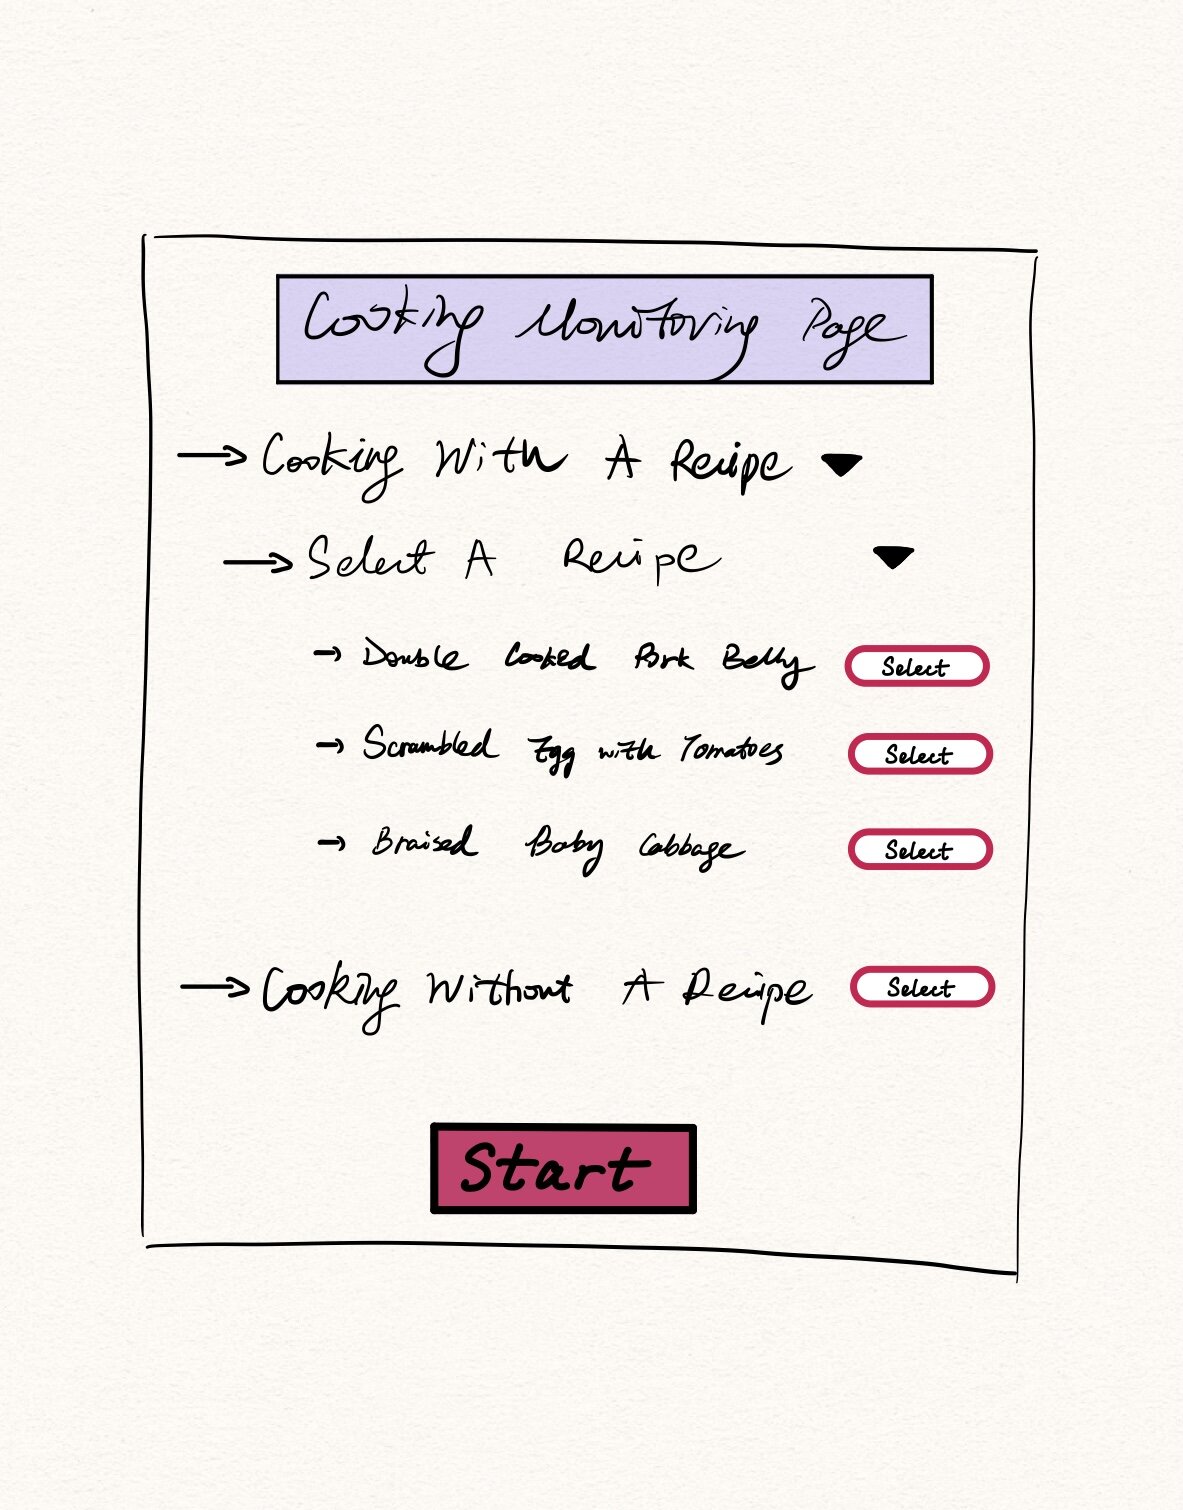
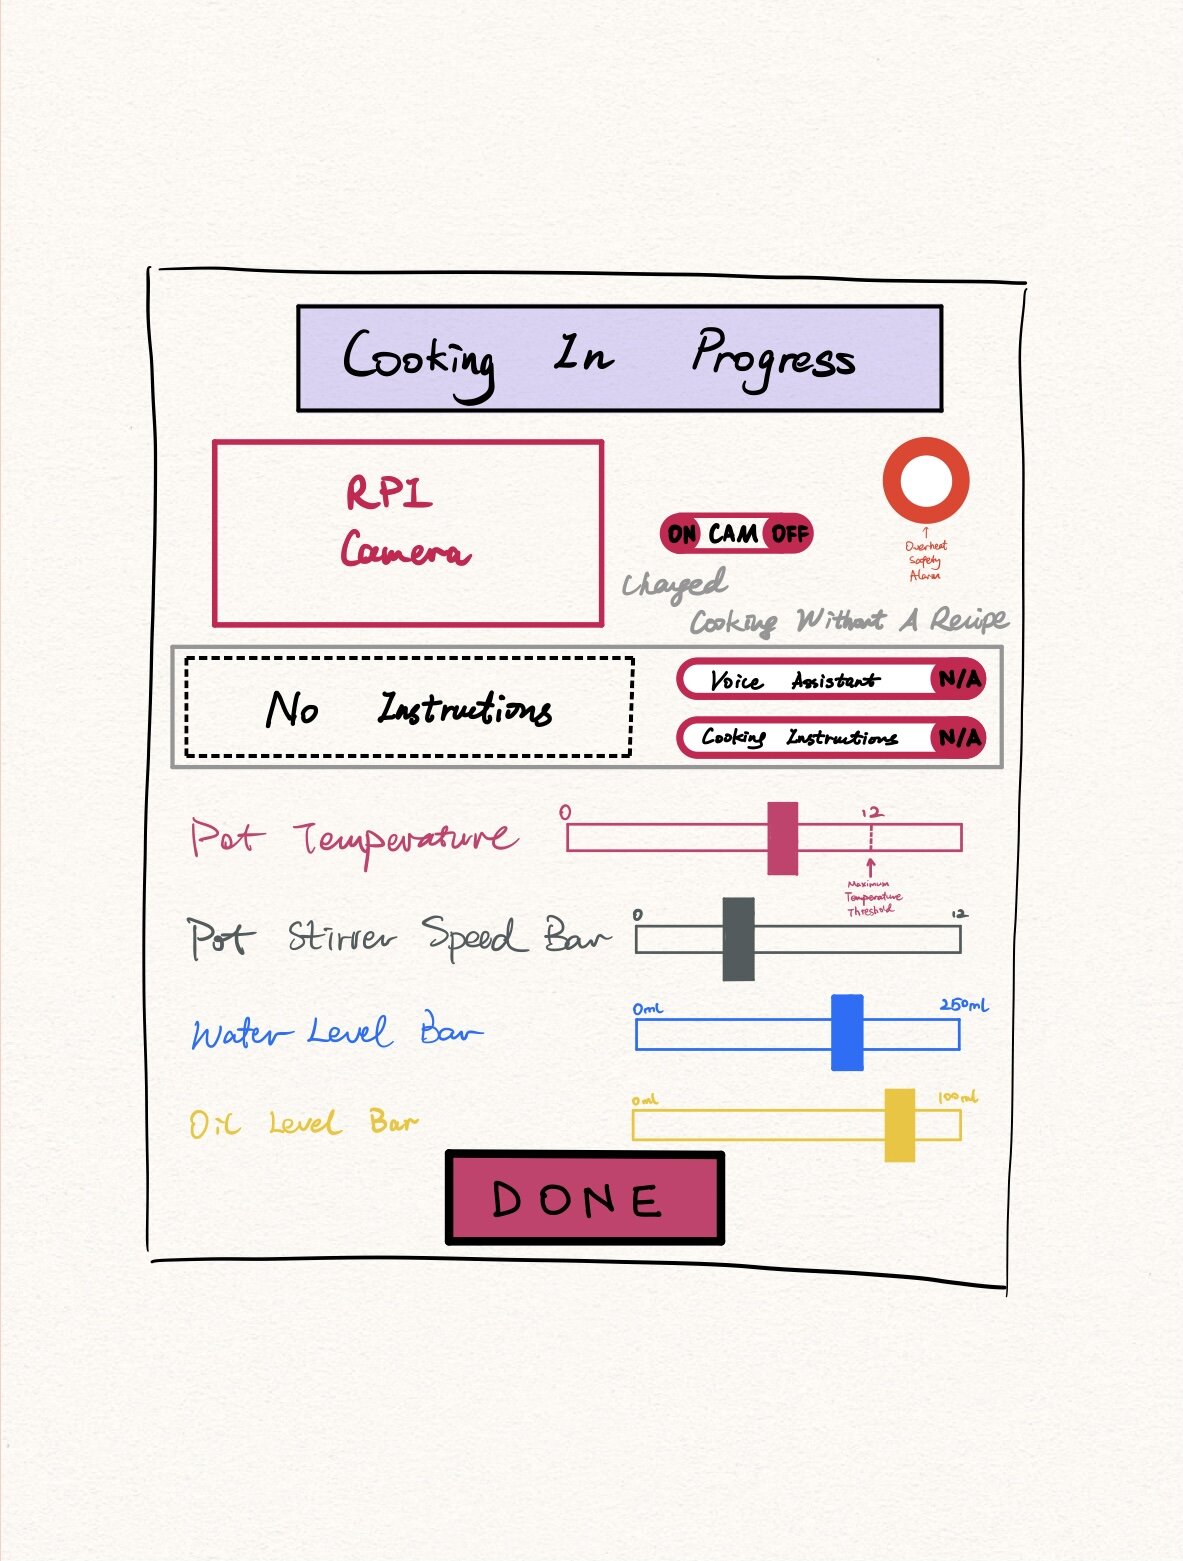

Cooking Monitoring Interface (4 pages)
Once the user fully sets up the cooking machine and the first recipe, they can start making food by selecting the “Cooking Monitoring Page”. The user can choose “Cooking with a Recipe” or “Cooking without a Recipe”, and then they can push start to go into the corresponding “Cooking In Progress Page”.
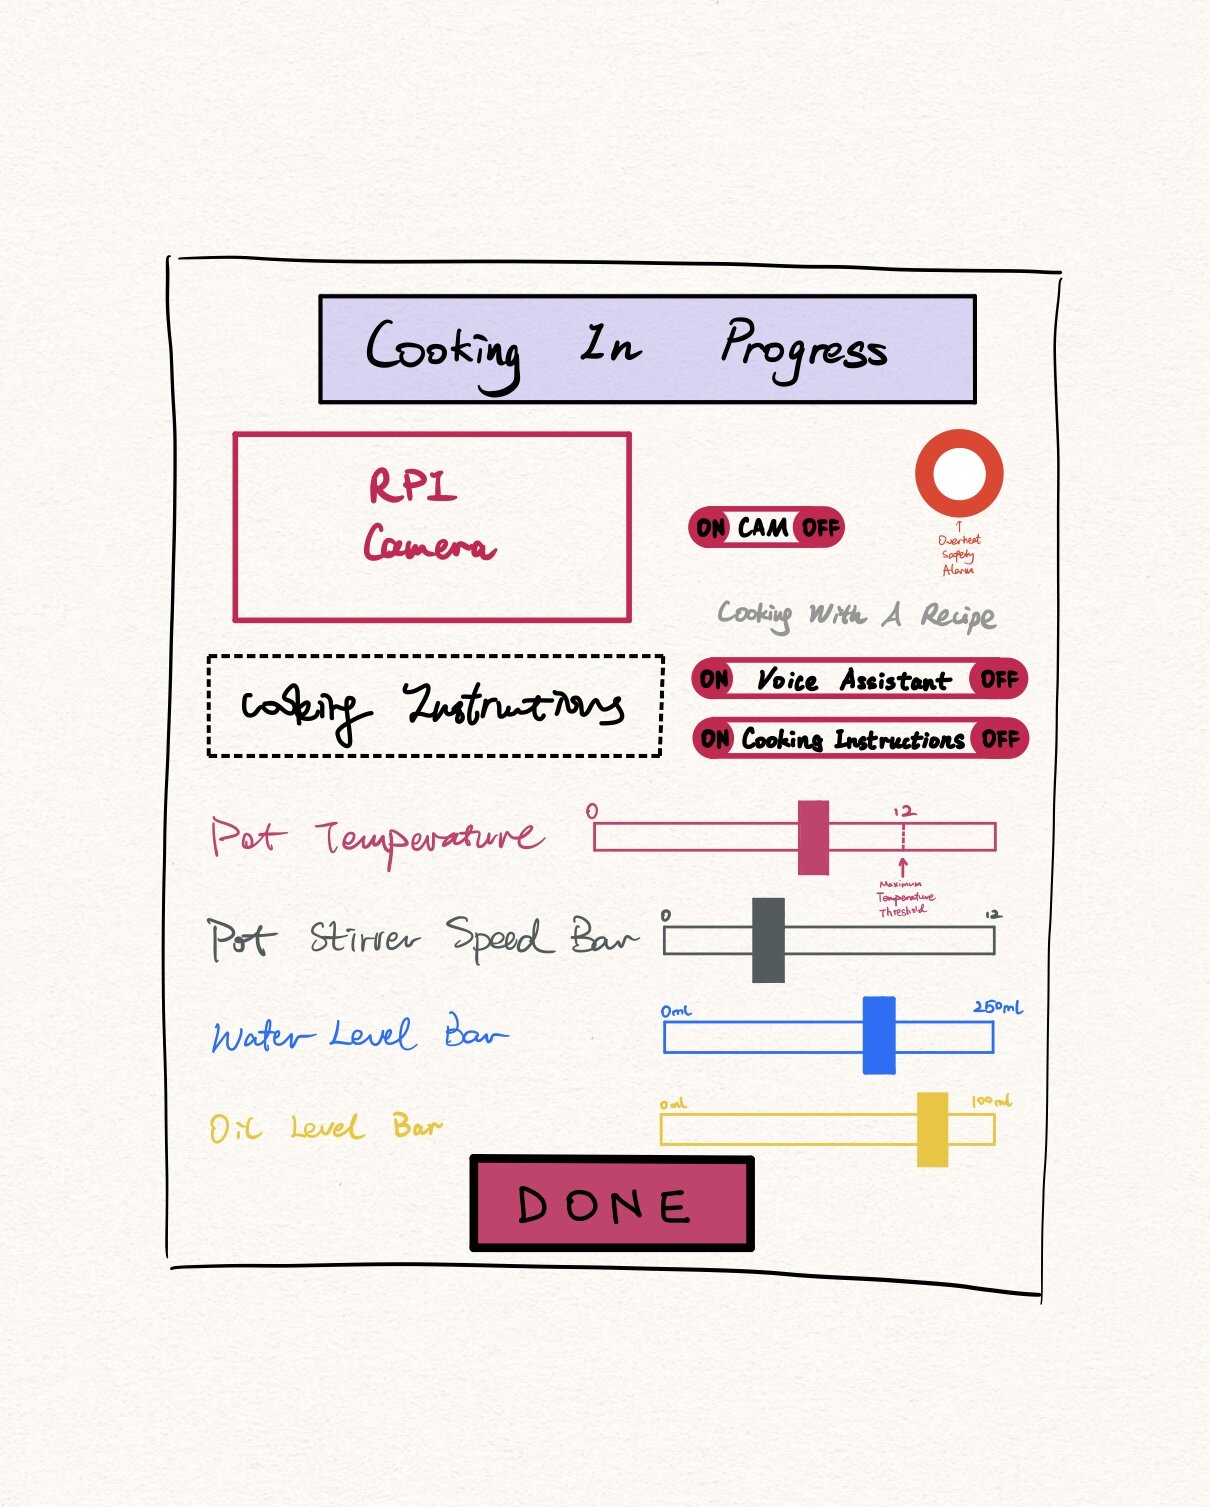
There are two variations of the “Cooking in Progress” page that are designed for both the “Cooking with a Recipe” scenario and the “Cooking without a Recipe” scenario. The difference in these two pages is the permission for users to turn on/off the voice assistant and the cooking instructions display. When the user is cooking without a recipe, both the voice assistant and the cooking instructions display are unavailable. However, all other functions on the “Cooking in Progress” pages are the same.
During cooking users can observe four sets of data bars, which are: pot temperature, pot stirrer speed, water level and oil level, and a Raspberry Pi Camera that monitors the cooking process which can also be turned on/off. Note that when the pot temperature exceeds the maximum temperature threshold, the overheat safety alarm goes off, making continuous sharp sounds on the phone app so users can turn down the temperature or turn off the pot’s power immediately. During the cooking process, users can manipulate these data bars. The modified data bar values are stored in a temporary cloud database as variation settings for an existing recipe or they can be saved as the settings for a new recipe.
Once the cooking is done, the user will be automatically taken back to the “Main Page” or to the “Save Recipe” page if they have cooked without a recipe or if they modified an existing recipe during cooking. On the “Save Recipe” page, the user will be asked if they want to save this recipe and edit its name. Once the user selects “yes” and confirms their selection, the recipe will be immediately stored/updated on the cloud database. This way, user can perfect their recipes and update the app’s recipe lists easily.

Cooking History & Analytics Interface
If the user wants to retrieve their cooking history or past cooking recipes, they can select the “Cooking History & Analytics Page”. Here, the user will be able to see the number of cooking times, cooking dates and past recipe variations for all the recipes the machine has cooked. If the user wants to retrieve a specific variation of a recipe, they can click the “Open Recipe Variations List” to select the desired variation.
The user will also be provided with information for all the cooking machine’s components with updated information on each component’s duration of usage over life span to check if the machine needs maintenance.
Software Tool for App Design
To build this “Cooking Robot” iPhone app, I’ll need to use a programming language called “swift” that’s developed by Apple. Although I haven’t programmed in swift before, I am looking forward to the challenge and plan to share my app development process in future posts.
Next, I’ll also look into crowdsourcing apps to learn how to raise funding for this project so that I can buy components and start testing. Stay tuned :)